DIY Make-Up Zipper Pouch

Image
  I made an easy make-up zipper pouch using leftover fabrics and was happy with the result. The final size was 26 cm x 12 cm. It's lovely, fluffy, useful and big enough to store all my makeup and skincare products.  Materials for the pouch: - Main fabric, lining and polyester batting, 40 cm x 50 cm. - Fabric tags (2x), 9 cm x 10 cm. - Bias tape band, 6 cm wide. - Zipper The sewing process started with topstitching (quilt style) the main fabric and polyester batting together. After that, I sewed the zipper at the main fabric (both sides). I attached and sewed the lining to the main fabric, right sides together. And then, topstitched both sides of the zipper. And cut the excess zipper.  I sewed the tags and inserted them in both sides of the end of the zipper and sewed along the lines. I sewed the bias tape bands on both sides. And cut the corners in square shape 4 cm x 4 cm (not including seam allowance). I connected the squares together and sewed them. I sewed the bias ta...

Silk Blouse

I'm glad that I finally finished another project from last month, a silk blouse with a side knot Burdastyle pattern 12/2019 size 38. My plan was to make it for my entry to magamsewalong "December Dreaming" challenge on Instagram but life was so busy and I couldn't make it on time. 
For the fabric, I used my dream fabric from stash, floral silk crepe de chine. I bought it in the local shop a while ago and I really love the print. 
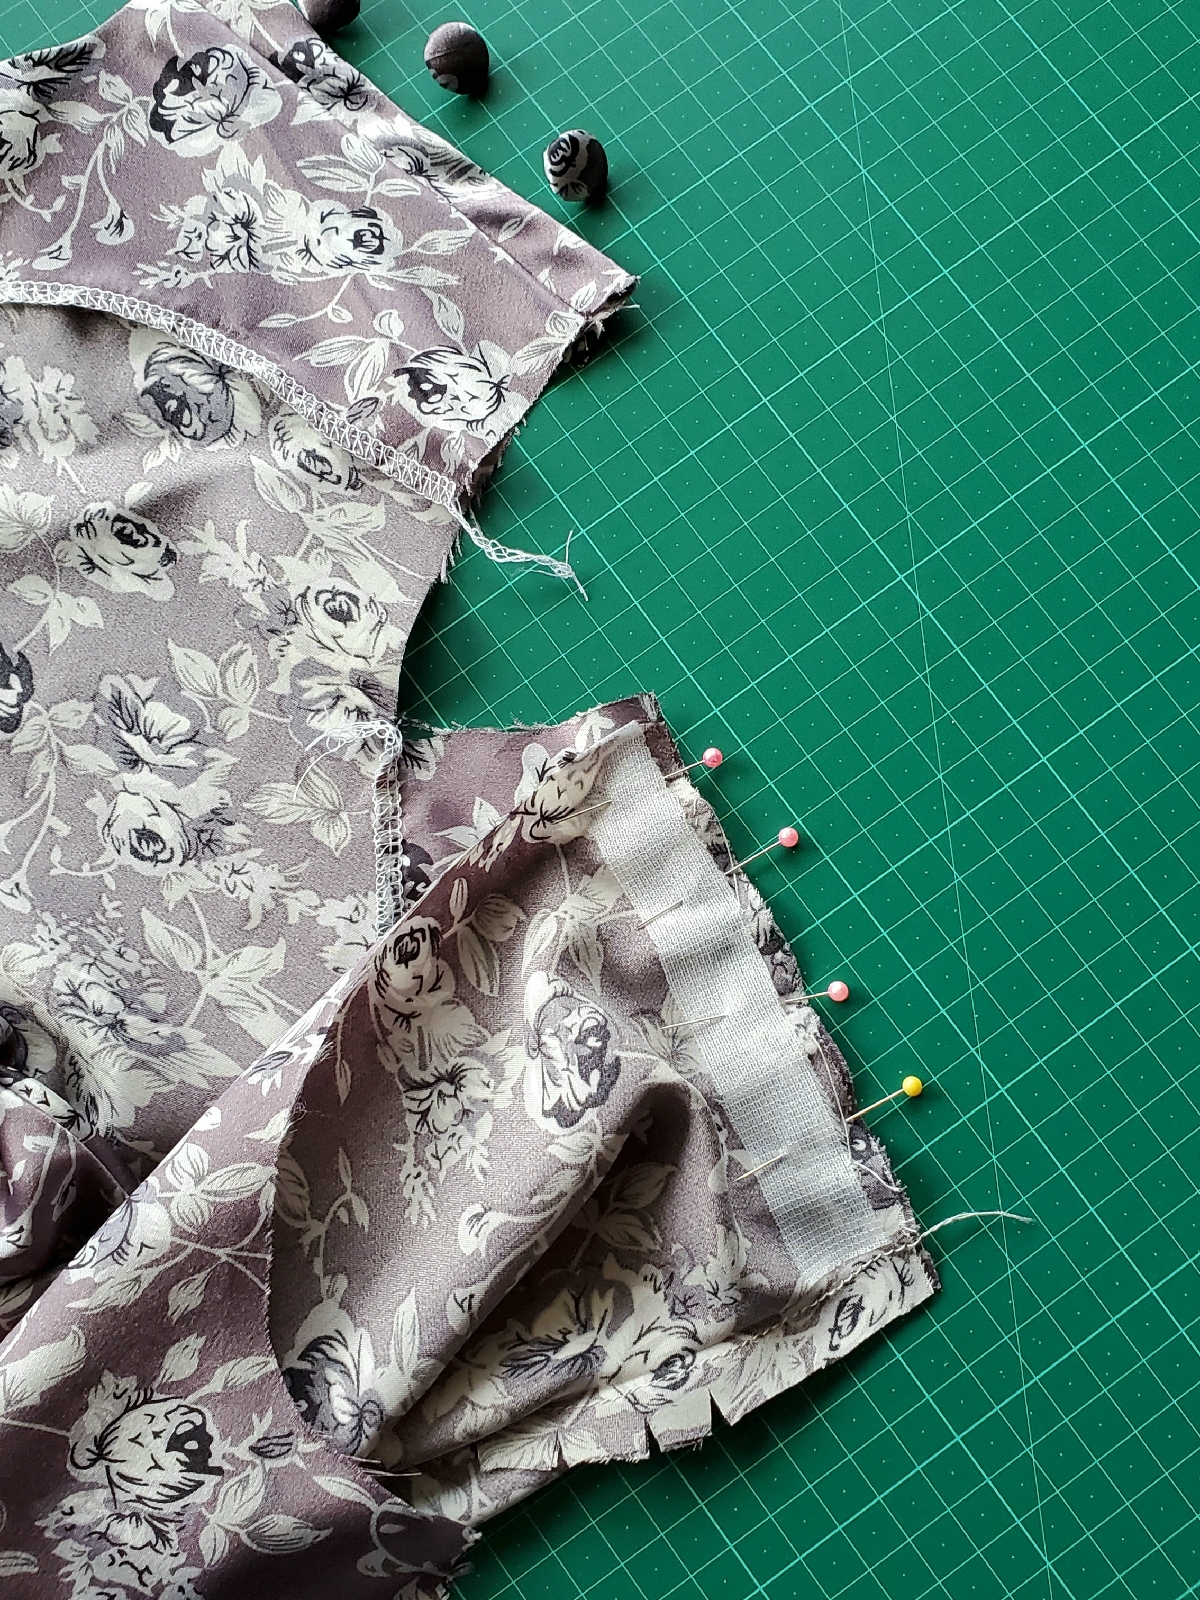
The sewing progress was difficult but I managed to finish it after many errors, basting and pinning (my pattern instruction was in the German language, no time to translate, just sew the blouse with my self-taught). 
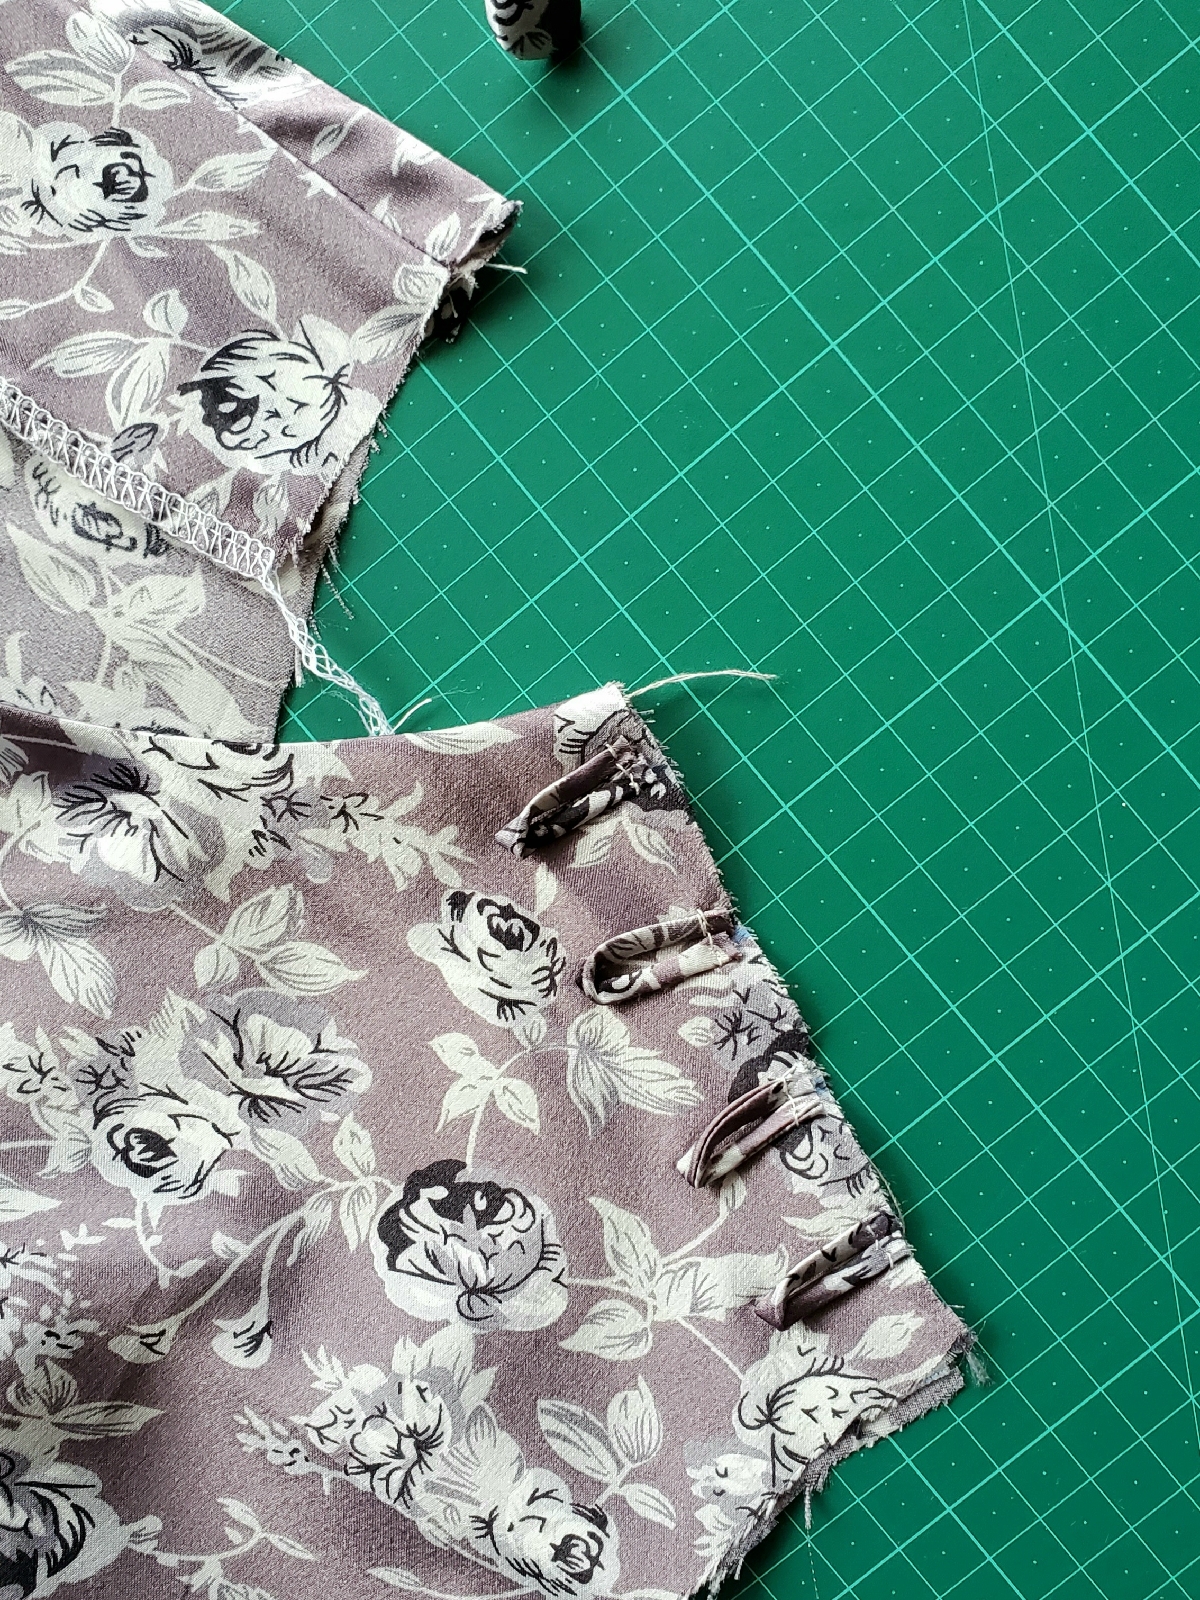
Firstly I was working on the front pieces and created them into a side knot. After that, I worked on the left shoulder line, sewed the band for the buttons closure in the back shoulder piece. Also, made self-cover buttons using the same fabric.

After the sewed the band, I basted the loops in the front shoulder piece.

Pinned the facing over it and sewed.

Here is the result. The loops look neat and nice. After that, I hand sewed the buttons on the back shoulder piece and made sure that the loops and buttons closed properly.


After the difficult part is done, I sewed the sleeves and hems. And here are the pictures of the finished blouse, on the dress form and on me.

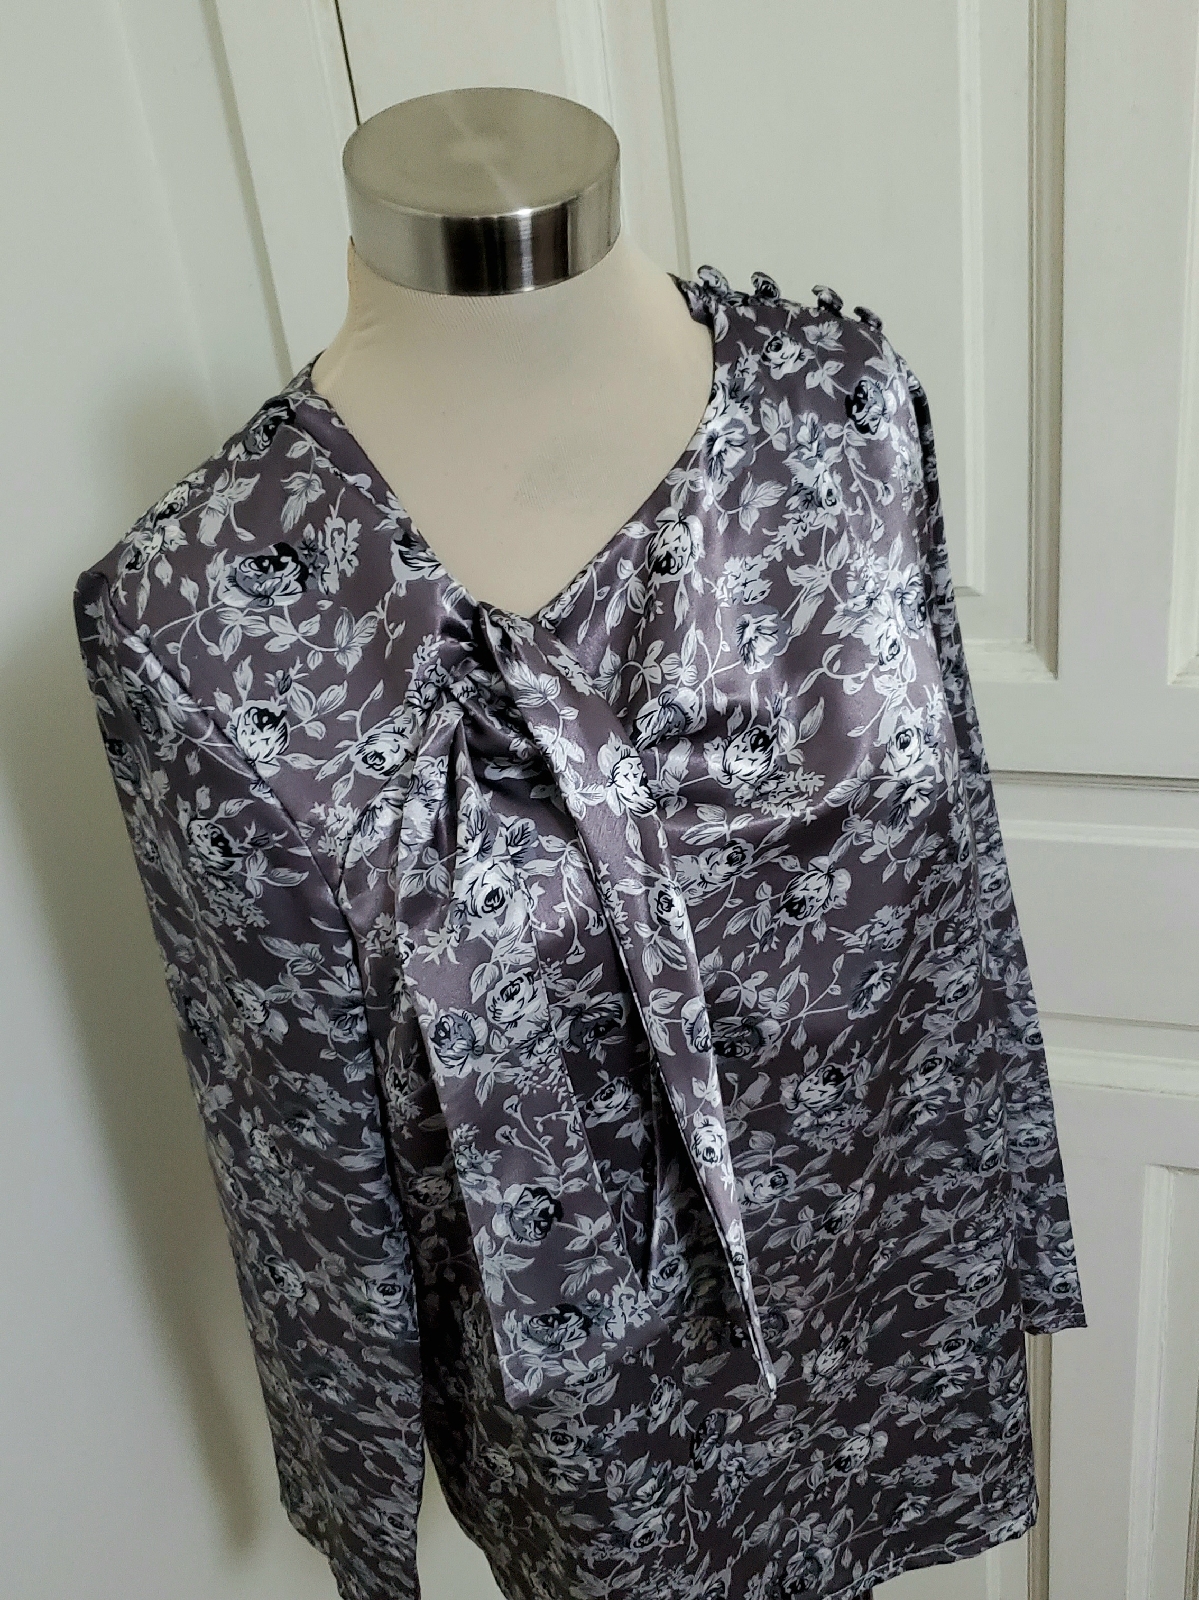
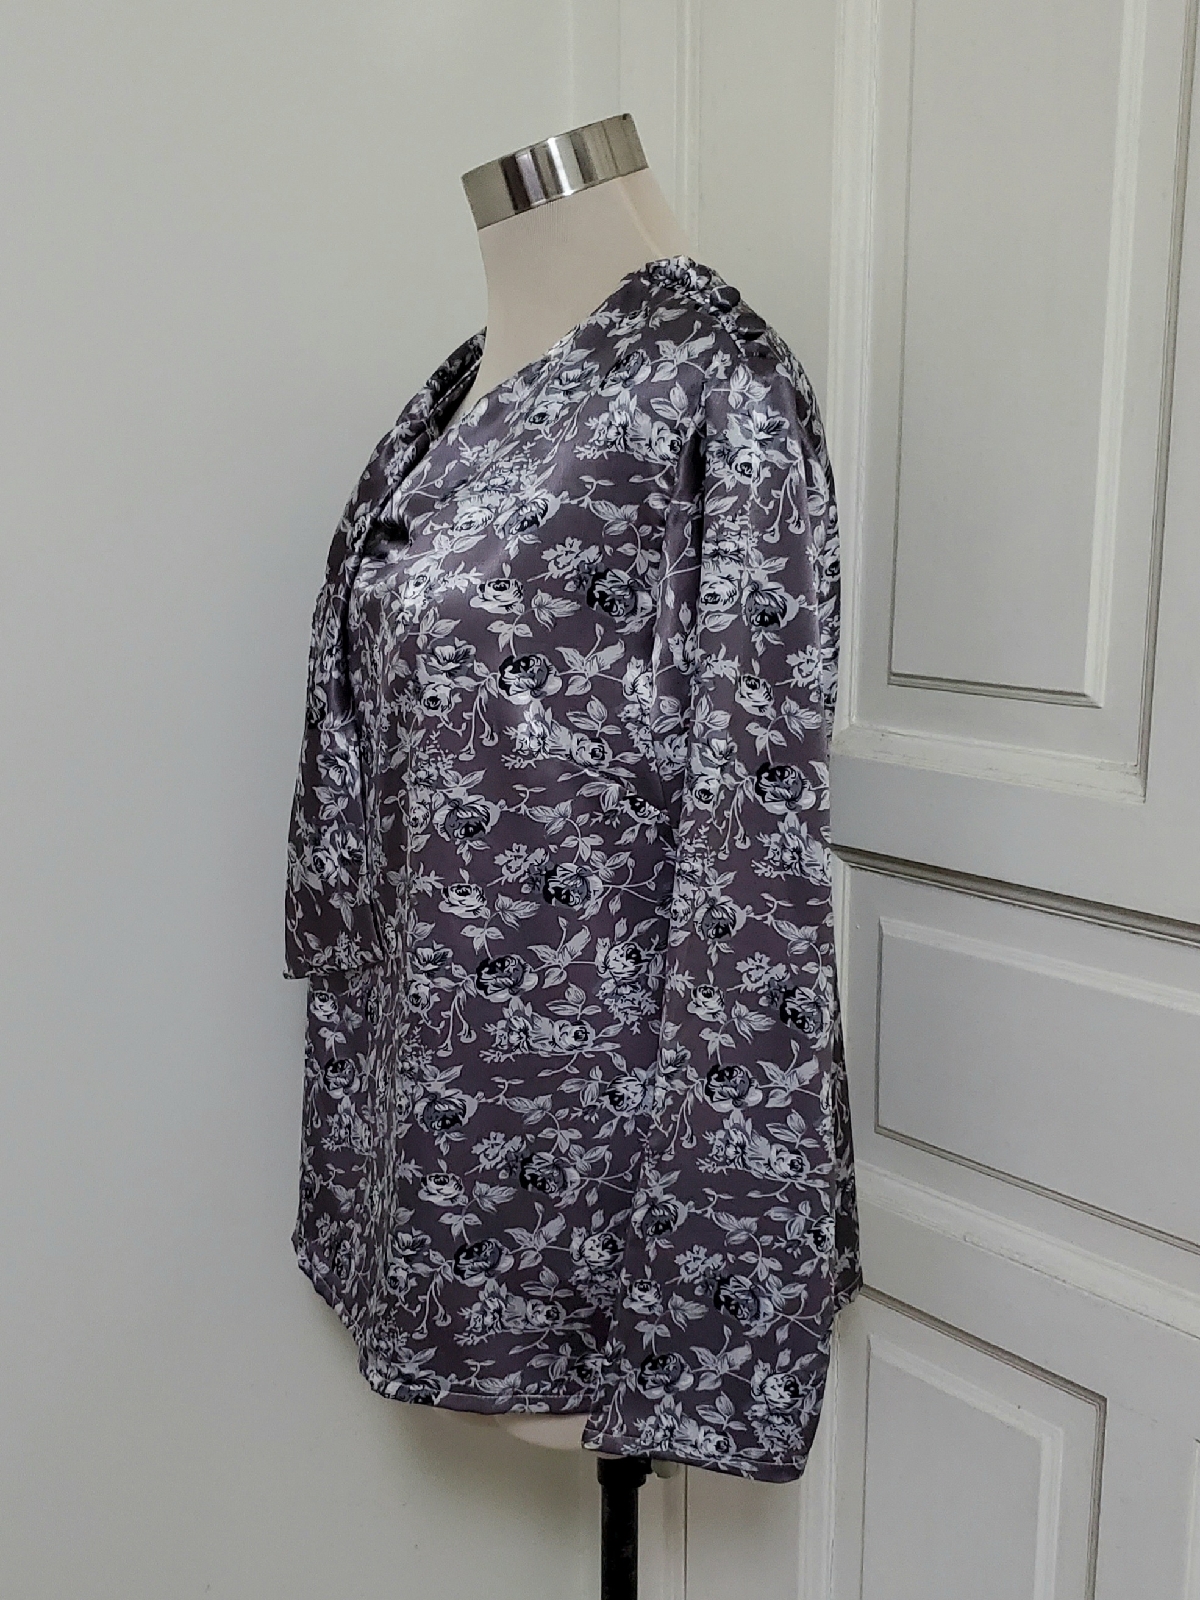
I think is enough for today. I love this blouse and this will be a good addition to my wardrobe. 
Thank you for hosting the challenge, Sue, Suzy, and Helene. I hope I'm not going to be late again for the January challenge šŸ’—šŸ’—

Happy sewing āœ‚

Comments

Post a Comment