Hi everyone..
Today post is the continuation of my weekly update "Diy Friday". Sorry for not updating my diy's episode for so many weeks, I have been busy with a lot of good things :)
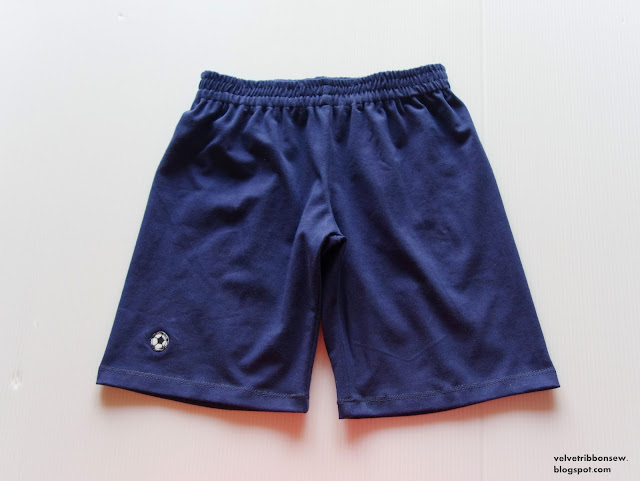
My little boy needed some new shorts to wear on summer. All his shorts are getting small and tight at the waist. Well, I decided to search my stash and found leftover of knit cotton that is enough to make two shorts. Yay!
Materials:
knit cotton
3 cm wide elastic
thread
Pattern:
Based on BurdaStyle Boy's Sweatpants 10/2013-124 size 110. I cut the pattern right on the knee and slashed a little (2 cm) in both sides to avoid tightness. I skip the front fly and pockets.
 |
| Image source: Burdastyle.com |
I worked on the pattern first, by glued the two pieces of the front and back together. So both sides of the patterns are in the middle. And then I added 1.5 cm seam allowances and hem allowance.
After that, I cut the fabric 2x.
Then sew the shorts, sew the waist and inserted the elastic.
Sew the hem using twin needle and for decoration, I fused a little ball fabric sticker in the corner of the shorts bottom. Done!
You can see here the final shorts, front and back views
And the closer look of the little ball, isn't it cute? :)
I am planning to make one more shorts with the same fabric but different decoration. Up to the boy, he will chose the train or the airplane :) I have both fused fabric stickers in my stash.
A little note:
I am linking this shorts to Caroline at sewcanshe.com for Show Off Saturday
Happy sewing!


Your little one must be very happy! The hem looks professional, just like a coverstitch hem!
ReplyDeleteThank you, Raquel. He is very happy with his new shorts :)
DeleteHe must love these! The soccer ball is darling -- perfect for a little boy!
ReplyDeleteHe is loving it and named the shorts soccer ball shorts :) So cute <3
DeleteThese are just so cute, love the little soccer ball - I'm sure these will be favourites :)
ReplyDeleteThank you, Sarah Liz. So happy that my son loved it :)
DeleteVery nice shorts, to sew them again with airplane or train, is a very good idea. He will love them, all.
ReplyDeleteHave a nice suday!
LG Carolin
Thank you, Carolin. I will be working on the second shorts tomorrow morning, my boy is needing more shorts :)
DeleteCute Shorts, I like the color! :)
ReplyDeleteSo cute! And very professional looking too :) x
ReplyDelete