Hello..
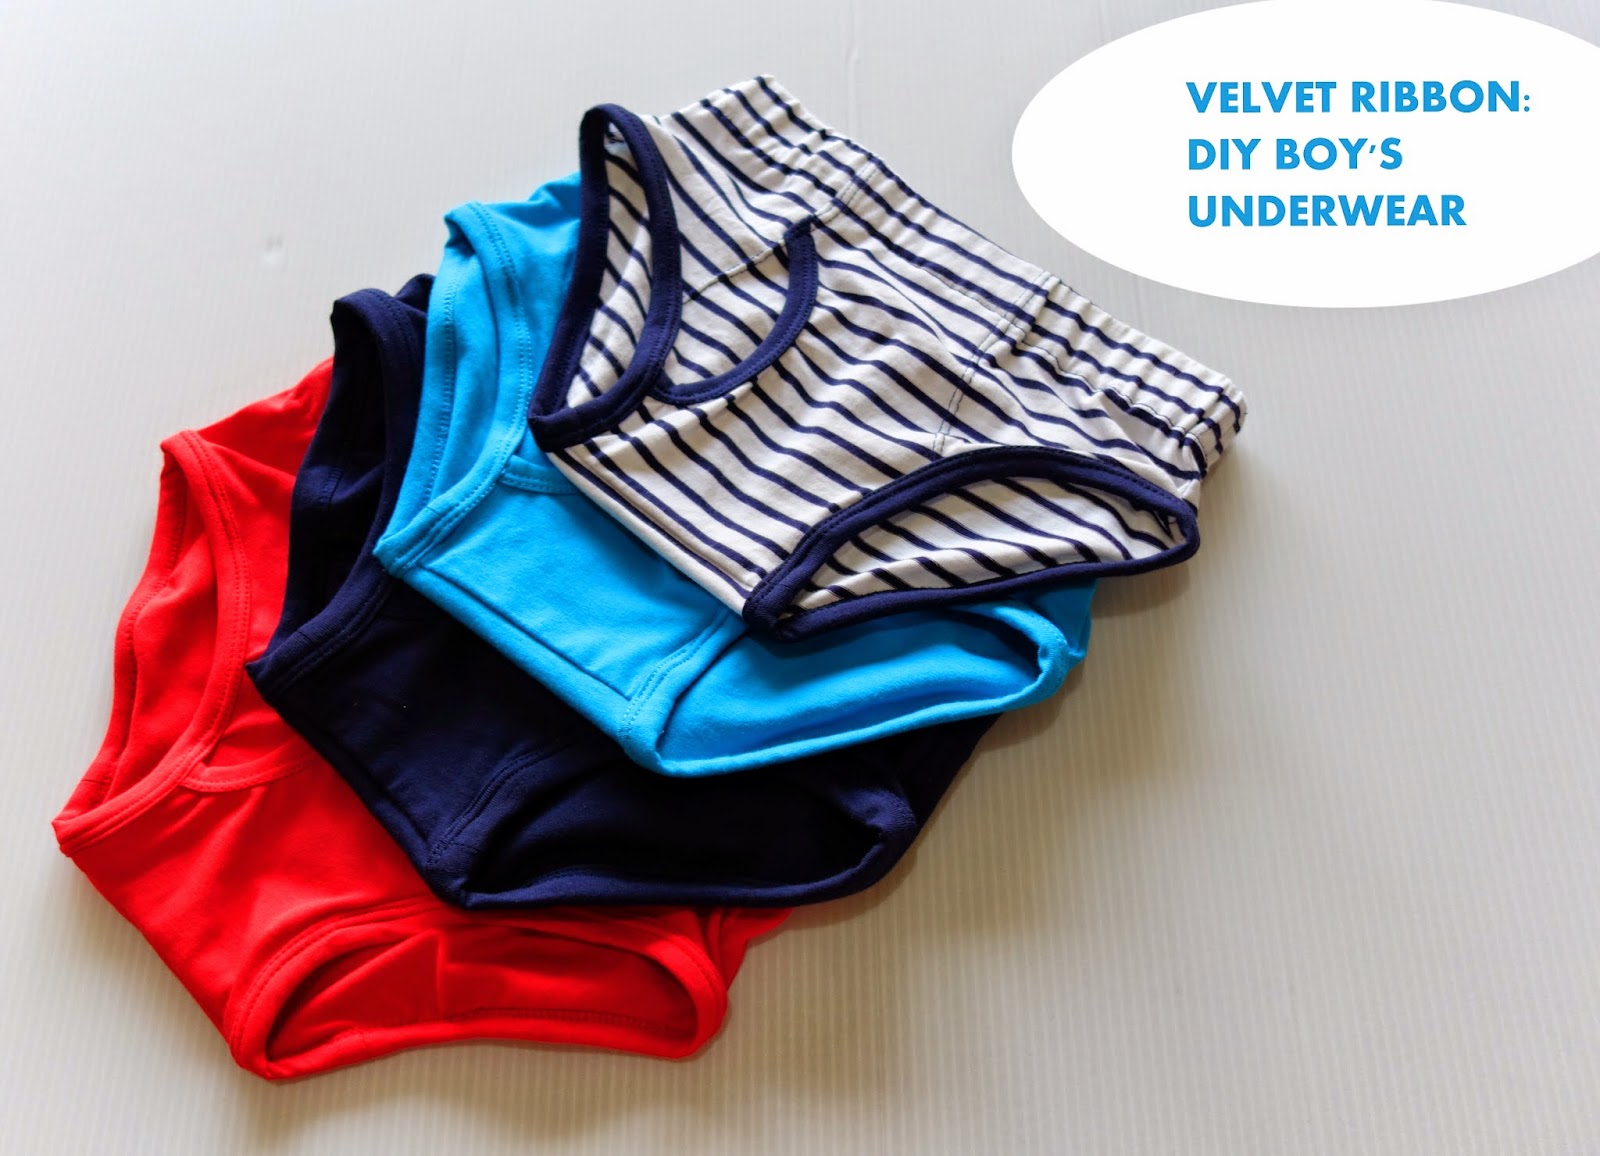
For my weekly update "Diy Friday", I made four underwear for my 4 year old son :)This little project wasn't easy to make. It took me almost one week to figure out the right size and fit for my son.
I found a free underwear pattern and tutorial from sew-ing.com but the pattern is for baby. As I want to make for a kid, I just read the tutorials and copied my son's old underwear for the pattern.
Materials:
Four different colors knit cotton fabric scraps from stash
2.5 cm wide elastic for waistband
threads
Sewing Process:
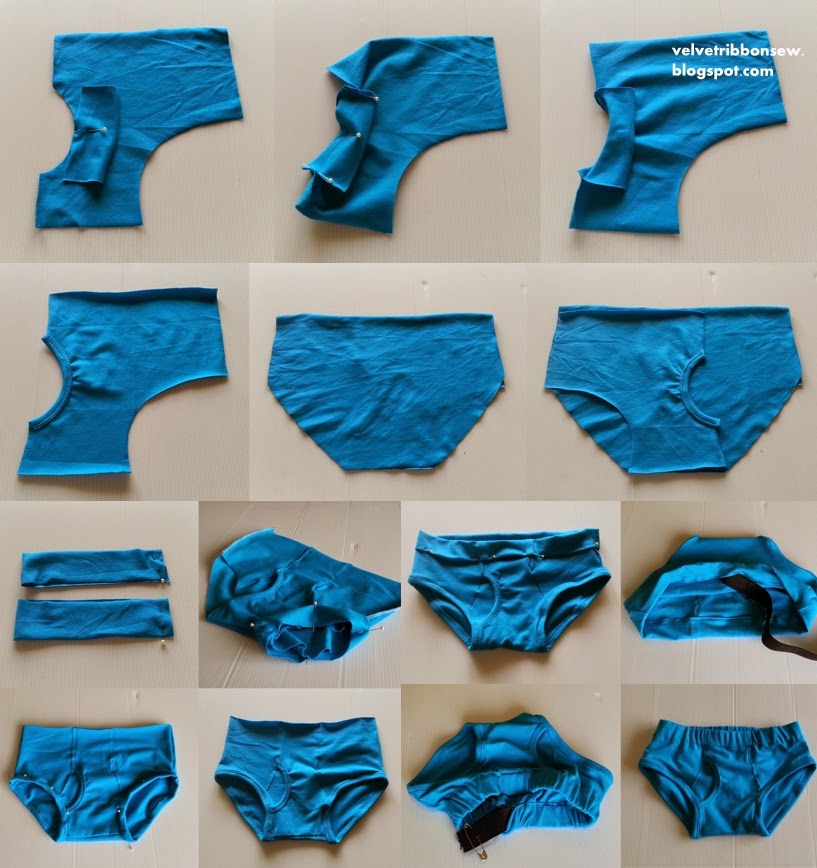
Firstly, I prepared the pattern by copying the old underwear.
I laid the underwear on the top of the ruler. Then I clip one side of the underwear using small clipper. Stretched the underwear and clip another side.
Then I put the paper on the top of the underwear. Weight each sides and copied. As shown in the picture below,

After the pattern done, I cut the fabric and elastic waistband. The fabric pieces should be two pieces of front side and one piece on fold of back side.
I cut the elastic 52 cm including 1 cm seam allowance in both sides.
I also cut 4 bands, 2 band for fly (4 cm wide x 11 cm long) - 2 bands for thigh (4 cm wide x 32 cm long) all the measurements include 1 cm seam allowance.

The rest of the sewing process was quite fun but a little bit tricky at the same time. I used a lot of pin, stitch and pull the fabric when inserted the bands.
I used two types of needles, blue point needle and twin needle. I also used an overlocked sewing machine to sew the fabric in both sides of underwear.
You can see some of the sewing process in the picture below,
And here is the final result of the underwear, front - back and inner views

And two more pictures of four of them. They are very cute aren't they? And more than cute, they are very useful and my son love them :)


Happy sewing!!
I am linking this little project to Caroline at sewcanshe for Show Off Saturday
Thank you for this post! These look easy and I think my son would like them!
ReplyDeleteYou are welcome, Annie. Sure, your son would like them :)
DeleteWhat smart underwear - I love the way your figured out how to make the boy's bit openings - they look fantastic. A real credit to you.
ReplyDeleteAhh.. Thank you, Sarah Liz :D
DeleteThose are so cute! Great job.
ReplyDeleteThank you so much, Caroline :)
DeleteSo cute, what a lucky little boy:) x
ReplyDeleteThanks Dawn :) xo
DeleteOH MY LIFE - they seriously rock -better than RTW - there is part of me that says "really" there are some things that are not worth the hassle but i take it back they were and are. x
ReplyDeleteThank you so much, Amanda :D
Delete