
I was planning to make this shirt last month for my entry to magamsewalong "Shirty September" challenge on Instagram but couldn't finish it on time. I thought this shirt was easy to sew but I was wrong. The sewing progress was taking longer to complete because I have to baste some parts before I sew them, such as the collar, the ruffles, and the plackets. Even so, I managed to make mistake on the collar and the ruffle, I sew them upside down and I have to remove them and start the progress again. It was a pain 😖 Also, I changed the plackets design into the usual one and I used a simple way to sew the sleeve slit and cuff. My problem was the pattern instruction wasn't in English and I didn't have time to translate, so I just used my self-taught.
But at least, after over a month and hard work, I finally finished the shirt and will wear it soon when the weather drops.

For the pattern, I used Burdastyle 12/2019 - 101 size 38. I shortened the sleeve by 2 cm and shortened the sleeve length and hemline by 1.5 cm. And I also added 0.5 cm in the sides and sleeves for ease.
For the fabric, I used rayon blend fabric in deep green from my stash. I bought this last year from the local shop.

I always love to see how nice the look of the fabric pieces is after cutting 😍 I had 11 pieces but in the end, I just need 10 pieces as I skip the right front placket. I decided to use the usual simple placket that both sides are the same.
Also, the original sleeve slit pattern was longer than what I wanted, so I reduced the length.

The progress started with sewing the bodices together, the back side has a double yoke and little gathers at the other piece, it looks nice and adds room to the back.
After that, I sewed the sleeves to the bodice before I work on the collar.

I fused fusible interfacing into the outer collar pieces and sewed them together. Pinned the ruffle piece in the middle between the collar pieces. Basted and stitched together.
And then, pinned and basted again the collar to the neckline right sides together. Sewed carefully.
After that, flip the allowance of another collar piece inside the neckline, pinned, basted, and hand-sewed it as I want a smooth finishing collar.
In the end, the result of the ruffle placement wasn't the same as the original shirt, it moved a little bit away from the center front but I like it, not too formal look 😊

After the collar was done, I work on the front ruffles and plackets. I started with gathering the ruffles and stitching the upper side of the placket pieces with 1.5 cm seam allowance right sides together, clipping the corner and turning it inside out.
And then I flipped both allowances inside and iron them, as shown in the 1st picture.
I pinned and basted the ruffle, and pinned the front placket in it. After that, I sewed them together carefully for both sides.

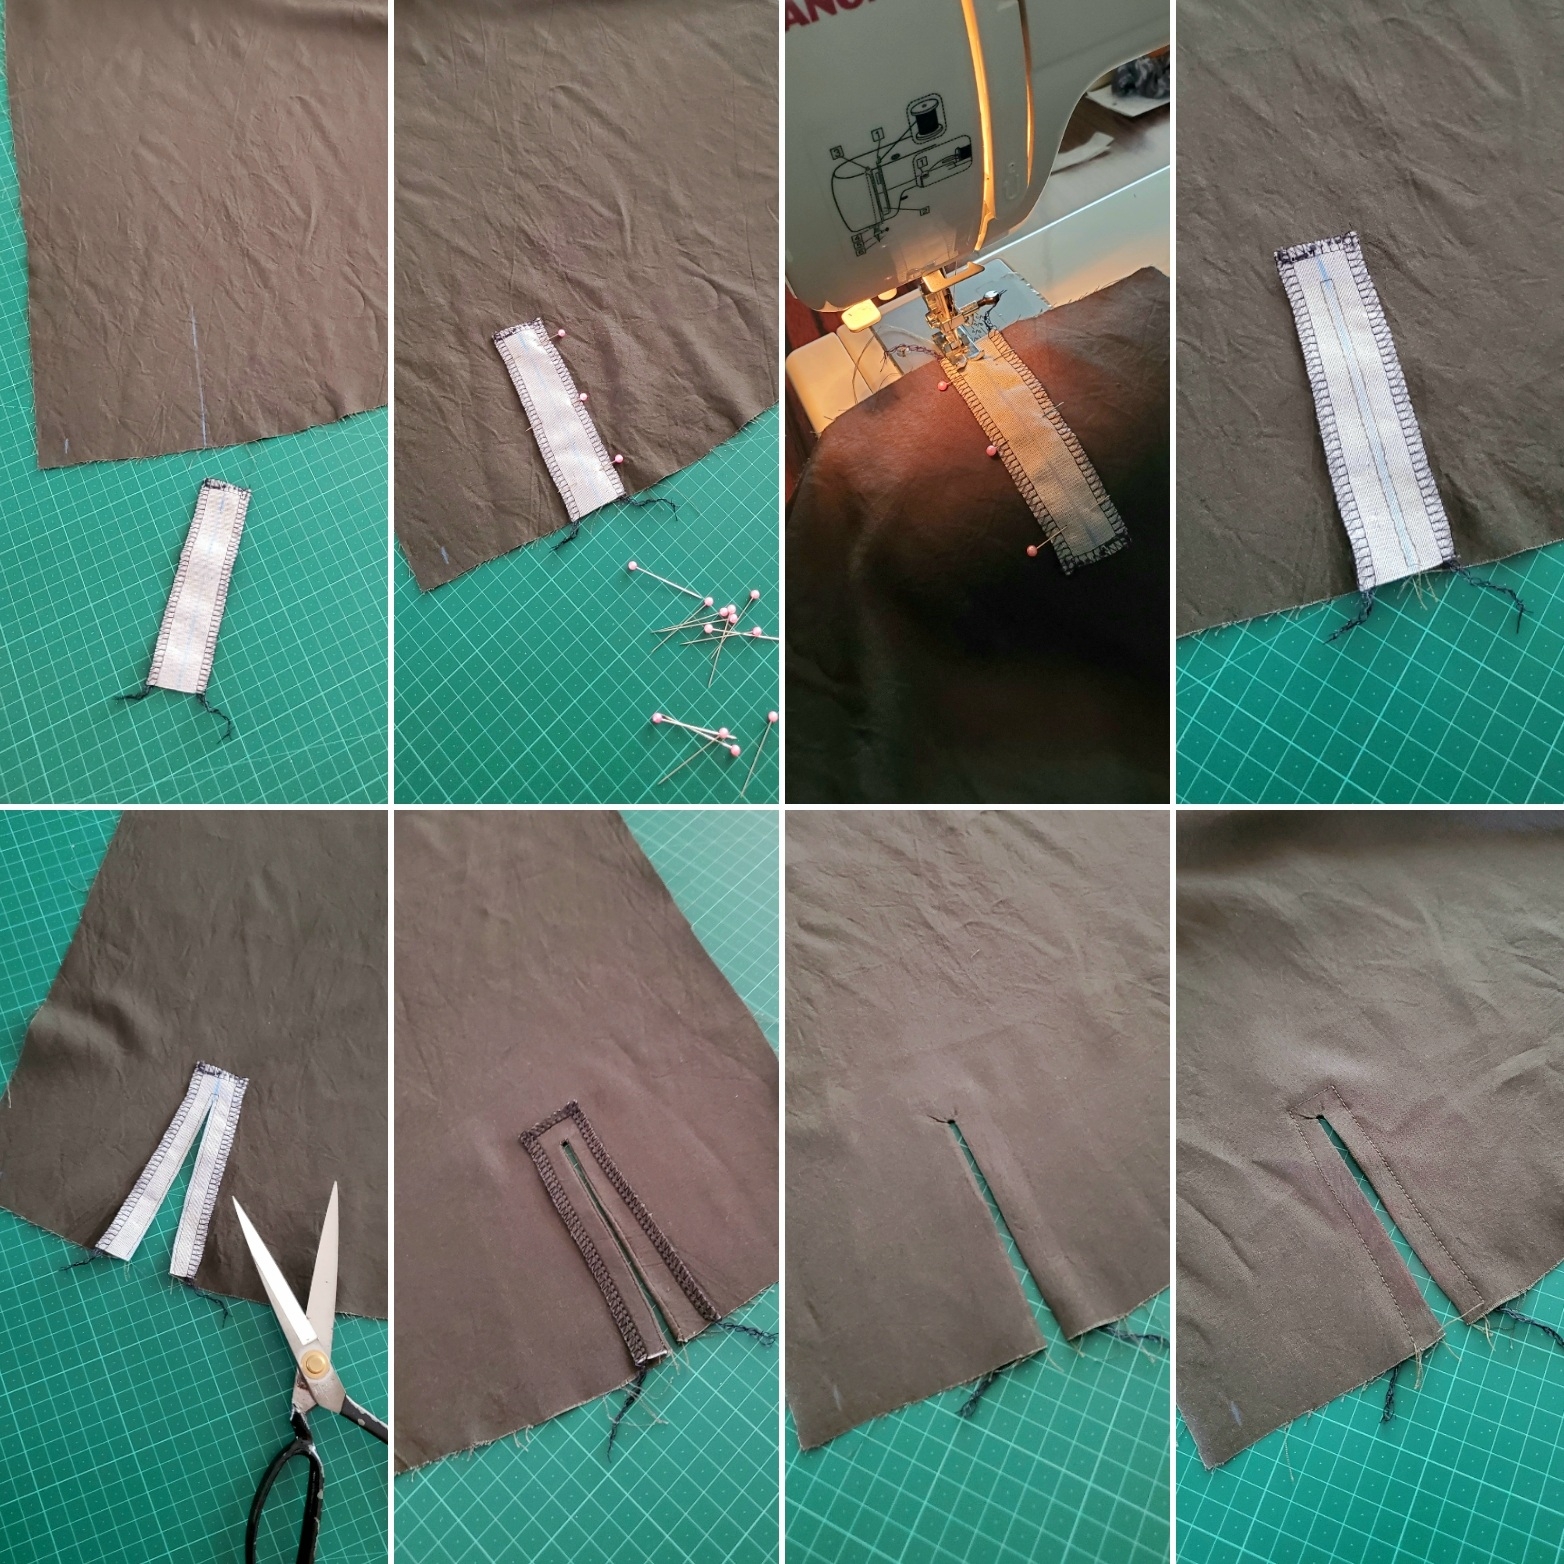
After the plackets were done, I worked on the sleeve slit, I measured 12 cm long and 3 cm wide, and fused them with fusible interfacing.
I pinned the slit piece and the sleeve's right sides together. Sewed carefully with a space of 0.5 between the slit line.
Cut the middle line.
Turned the slit piece inside, ironed it and top-stitched it 0.5 cm. Easy method, isn't it 😍
And then, I worked on the sleeve cuff by fusing both cuffs with fusible interfacing and gathering the sleeve ends.
Pinned the cuff and the sleeve's right sides together, leaving a 1.5 cm allowance free on both sides. Basted and stitched them together and ironed the pieces in one way.
Folded the cuff allowance inside and pinned the rest of the cuff into the sleeve line. Inserted the elastic in the front side of the cuff.
Stitched it from the corner of the cuff along the upper line.

And then, I sewed the buttons and buttonholes. I'm glad that my machine came with automatic buttonholes, faster and easier to work with than the manual ones.


The last step was sewing the hemline and I used blind hem stitch.
I relieved! My shirt is done and I can start another project 😄😍
Here is the look of the shirt and I really love it.


Happy sewing friends and thank you for stopping by 💗💗
Magam Sew Along #magamsewalong is a monthly challenge on Instagram, hosted by Sue @suestoney and Suzy @sewing_in_spain and last month's guest host was Sarah @2duck_swimming Thank you for hosting ladies. I look forward to this month's challenge and I hope I'm not going to be late again 😍
Comments
Post a Comment