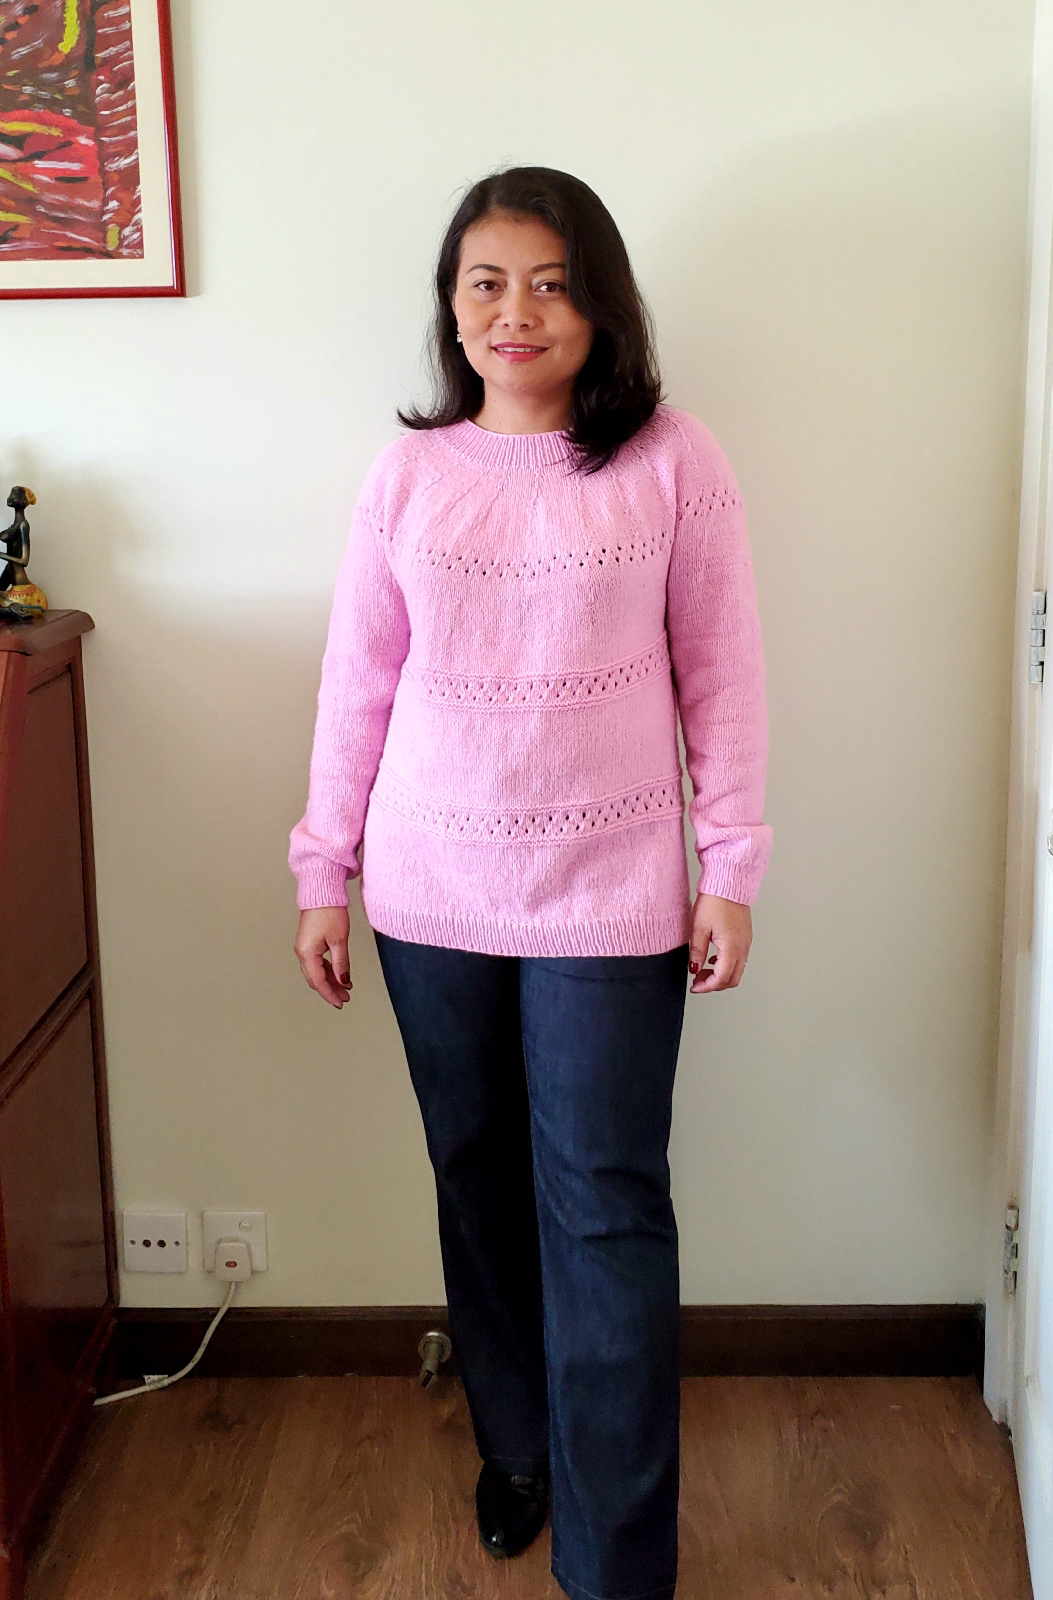
I started this sweater in May last year, it was very slow progress with a lot of errors. I unraveled the sweater three times but in the end, I'm happy with the final result. I posted the journey of making it on my Instagram , so I'm not going to show the photos again in the blog.
The original plan was to knit a simple eyelet sweater, square bodice and drop shoulder but in the end, I changed my mind and knit a seamless bottom-up sweater with decorative eyelets.
For the yarn I used Linie 152, Paloma, in orchid color and pattern was my own. I used 2.5 mm and 3 mm circular needles.
The progress was really slow and I took a break for three months during the summer holiday.
And after some errors and unraveled the yarn for three times, I chose a seamless bottom-up sweater with three rows of decorative eyelets,
- I started with a cast-on 240 stitches and 1x1 rib stitch using 2.5 mm circular needle.
- Knitted in the round until 15 cm from the beginning of the row.
- Decorative stitch, started with the combination of purl one row and knit one row (2x). And then staggered eyelet stitch followed with purl and knit combination (2x).
- Repeated number 1-3 for the second decorative eyelet and skip the purl and knit combination for the third decorative eyelet.
- Knitted the sleeves, started with cast on 56 stitches, 1x1 rib, knit around and I increased some rows until reached 43 cm.
- I joined the bodice and sleeves together and decreased some rows and a lot of stitches to shape the shoulder.
- I did 1x1 rib stitch for the neckband and bind-off.
- Seamed the hole at the armhole where the bodice and sleeve meet using Kitchener stitch.
And here is the final result, I love the color and the decorative stitches. The sweater length is 63 cm from the shoulder line to the hem.
The final sweater is a little roomy and long, but it's fine for me as I need this kind of sweater to wear in my daily life.
The picture below, I wore it with my Ottobre denim pants.
That's enough for today, I'd love to knit another sweater with a top-down method in different color and type of yarn. I will see....
💗


you're so talented. This is a beautiful pink sweater.
ReplyDeleteThank you, Ivana 💕😊
DeleteWhat dedication to unravel your sweater three times, but the beauty in the final result is worth it!!
ReplyDeleteThank you,,Vanessa. Knitting is the best way to relax (for me) 😊💕
DeleteBonito jersey y bonito color. BESICOS.
ReplyDelete