Hi everyone,
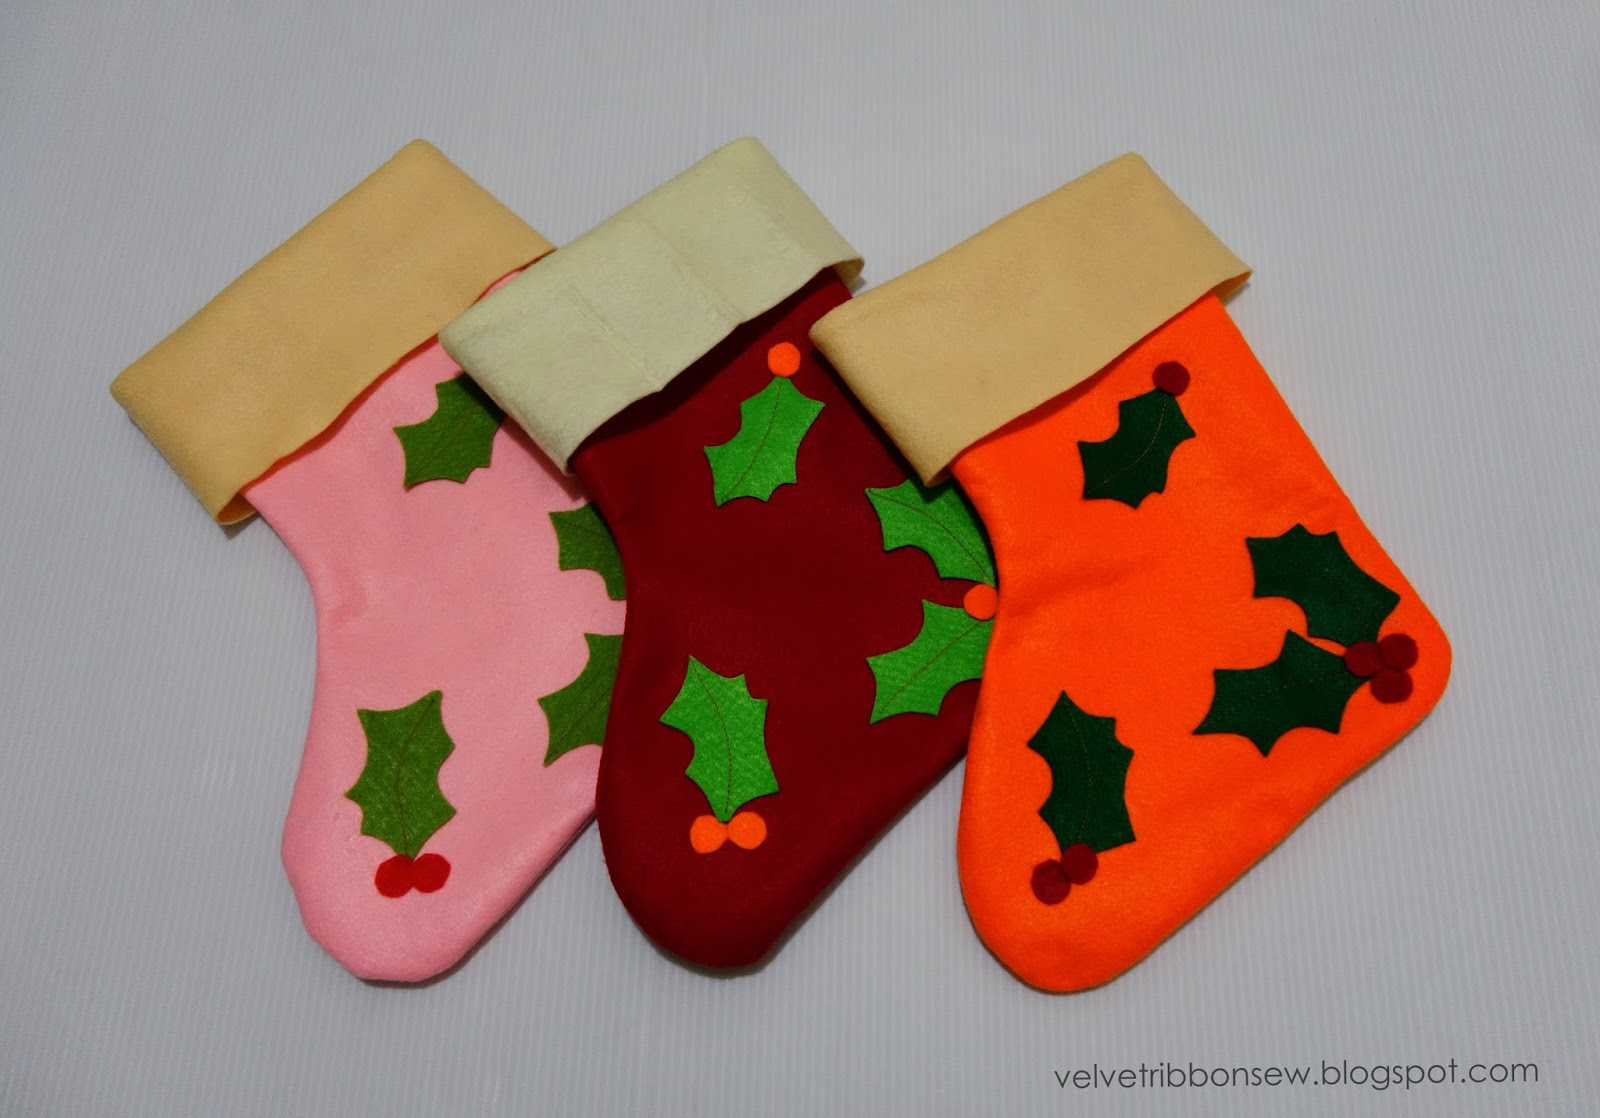
I made three Christmas stockings! It was another easy and fun project to make. The pattern is self drafted - copied from my old stockings. I added the stocking top, holly leaves and berries as decoration. The size is 28 cm tall.
Well, before I show you my process let's take a look at the finished stockings :)

Pattern:

Materials:
Polyester felts - orange, red, pink, beige, cream and three different shades of green. Thread and fabric glue.
This picture below shows the materials that I used for the pink stocking only,

Sewing Process:
Using the brown thread, I sewn the middle of the leaves to create the vein.

Sewn the end of the stocking top right sides together - turned inside out.
Sewn the stocking body right sides together, trim along the allowance with zig zag scissor.
Turned the stocking inside out.
Place the stocking top and body as shown in the last picture.

Pin the right side of the stocking top facing the wrong side of the body. In this case the stocking top is inside the body.
Sew around and pull the stocking top outside.
After that, I folded the stocking top as shown in the last picture.

Glued the holly leaves and berries. Done!

And here are two more pictures of the finished stockings, they are easy to make isn't it?


Happy Crafting!
Love,
Hana
I made three Christmas stockings! It was another easy and fun project to make. The pattern is self drafted - copied from my old stockings. I added the stocking top, holly leaves and berries as decoration. The size is 28 cm tall.
Well, before I show you my process let's take a look at the finished stockings :)

Pattern:
- Stockings top on fold, 18 cm long and 8 cm wide, added 1 cm seam allowance except in the bottom.
- Two kinds of little holly leaves 7 cm tall with berries - I didn't draw the berries but I cut it directly to the felt, 1.5 cm diameter. The holly leaves and berries were the smaller size from my previous project.
- And the stockings body cut two pieces. 18 cm at top, 28 cm tall and 23 cm at the bottom - added 1 cm seam allowance

Materials:
Polyester felts - orange, red, pink, beige, cream and three different shades of green. Thread and fabric glue.
This picture below shows the materials that I used for the pink stocking only,

Sewing Process:
Using the brown thread, I sewn the middle of the leaves to create the vein.

Sewn the end of the stocking top right sides together - turned inside out.
Sewn the stocking body right sides together, trim along the allowance with zig zag scissor.
Turned the stocking inside out.
Place the stocking top and body as shown in the last picture.

Pin the right side of the stocking top facing the wrong side of the body. In this case the stocking top is inside the body.
Sew around and pull the stocking top outside.
After that, I folded the stocking top as shown in the last picture.

Glued the holly leaves and berries. Done!

And here are two more pictures of the finished stockings, they are easy to make isn't it?

Happy Crafting!
Love,
Hana
Hana, so cute..
ReplyDeleteI love stockings.. They look cute hung, just about any where.. Happy Crafting..
Thank you Judy. I glued mine with double side tape in the back of the main door :) There is no more place to hang in my house :)
DeleteThe stockings are very beautiful and sweet!
ReplyDeleteHave a nice and happy weekend!
LG Carolin
Thank you, dear. Have a nice and happy weekend to you too :)
DeleteYou are so good at little handicrafts Hana. Your children are very lucky :) xx
ReplyDeleteThank you, Dawn. You are so sweet :)
Delete