
Hello, I was planning to make a basic outfit (long sleeve t-shirt and denim pants) in February and I managed to finish the long sleeve t-shirt on time. I posted the detail on my IG, here is the link in case you are interested to see it.
After waiting for almost one and a half months, I finally finished the denim pants. Too bad that the weather is getting hot, so I will wear them in cooler weather. Both the long sleeve t-shirt and denim pants were my entry to "Fit February" #magamsewalong challenge on Instagram hosted by Sue, Suzy and Sheila. I'm happy I finally finished the outfit that fit my daily life.
Here is the fabric I used for the denim pants, a medium-weight denim fabric that I bought during my trip to Bangkok in 2018, I bought 3 meters and still have leftover enough to make a skirt. Also, I used green cotton scrap for the pocket bags. The rest of the materials, zipper, snap fastener, fastener and threads were from my stash.

For the pattern, I used Burdastyle trousers 10/2013 - 127 A. I made some pants before using this pattern size 36, and also modified the pattern into the denim pants. And as I gained a little, this time I used size 38.
I didn't have too much time to sew or trace a new pattern, so I added 1,3 cm in all edges from size 36 and it worked.

The picture below is the look of my pattern after I modified it into jeans-style pants, I cut the back piece into two. And this time I skipped the front fly zipper and changed it into a centered zipper on the backside. Easy method 😊

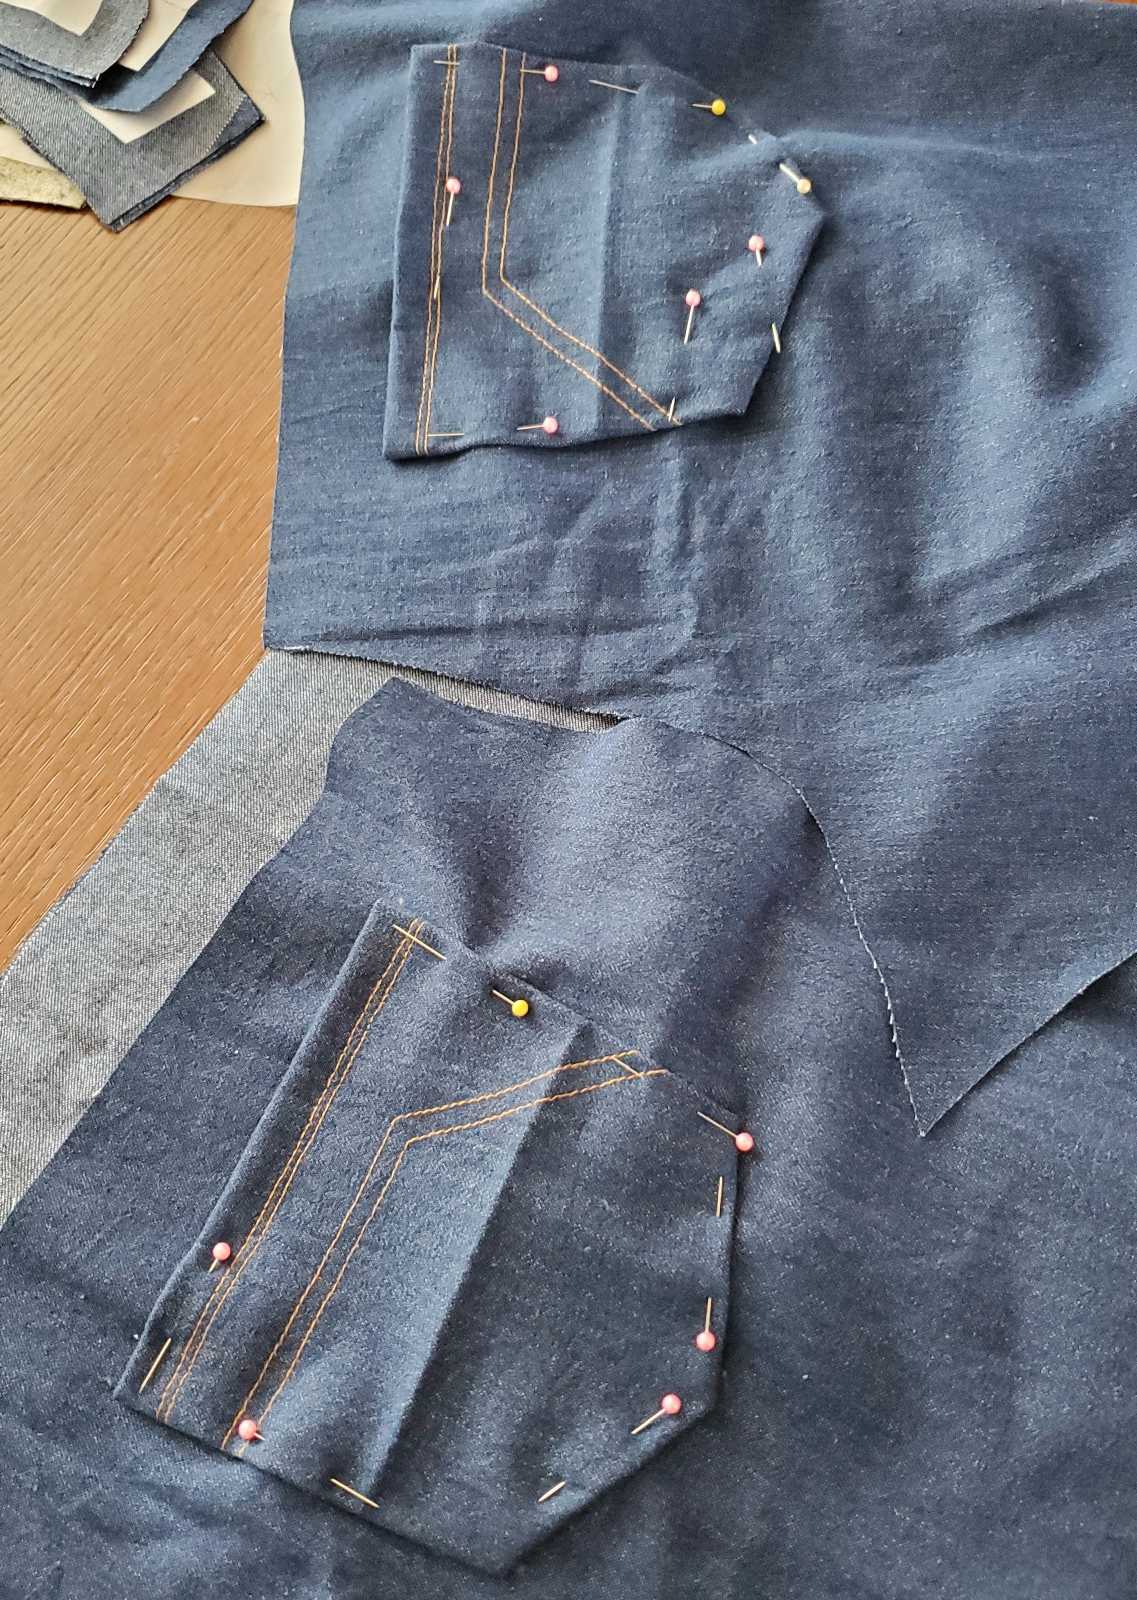
The sewing process started with sewing the decorative pocket, I used very simple stitches and then attached the pockets on both back pieces.
After that, sewed the upper back pieces and top-stitched them. As shown below.


After the pockets are done, I sewed the front pieces together at the crotch line and trimmed the fabric for the front fly zipper ( as I don't need it).
And then, sewed the sides (front and back pieces right sides together). Sewed the centered zipper at the center back and sewed the rest of the remaining back crotch line together.
I sewed both inner legs' right sides together.
And attached the waistband, top-stitched it.

I hand-sewed the snap fastener and fastener on both ends of the waistband above the zipper. As shown below.


I think it's enough for today, I will update this blog again as soon as I finished my dress.
Happy weekend and happy sewing dear readers 💗
Comments
Post a Comment