
I managed to finish #magamsewalong June dress with theme "Seasonal Stashbuster" by the end of the month, but only today I have time to write a blog post.
I like the pattern since the day I found it about three years ago, but somehow I didn't have a chance to make it. I was lucky to found the Simplicity magazine Autumn 2014 during our visit to Portugal, the magazine is in Spanish but I can follow the pictures and tutorials easily.
I also saw other patterns such as tunic and jacket that I want to make in the future.
About the dress, fabric is printed anchors and dolphins in red colour, 2.5 yards from stash, bought in Bangkok last year.
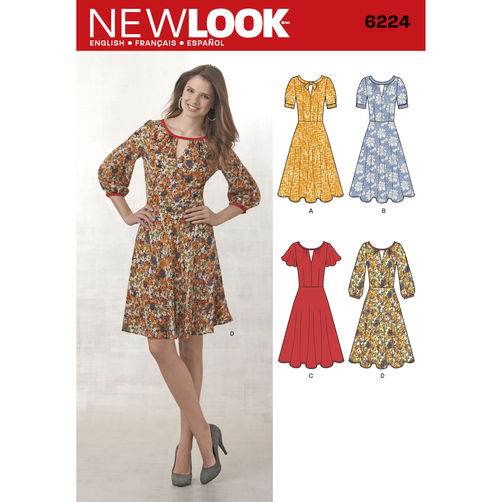
Pattern based in Simplicity New Look Misses Dress 6224 with Sleeve Variations size 36 model C with neckbands model B. I only used the bodice and modified the dress to one piece. What I did,
- I omitted the darts.
- Reduced the shoulder width 3 cm finished with armholes with 1/2" bias tape from the same fabric.
- I lengthen the bodice at the waist down to the hem 55 cm long and added few centimeters in both sides at the hemline to created a little A-line shape. I did for both front and back.
- Added inseam pockets, pattern from my other dress.
- Added two very long waist ties, 130 cm long x 6 cm wide that is enough to tie around my waist three times before I knot it.
- 1.5 cm seam allowances in all edges and 3 cm hem allowance.

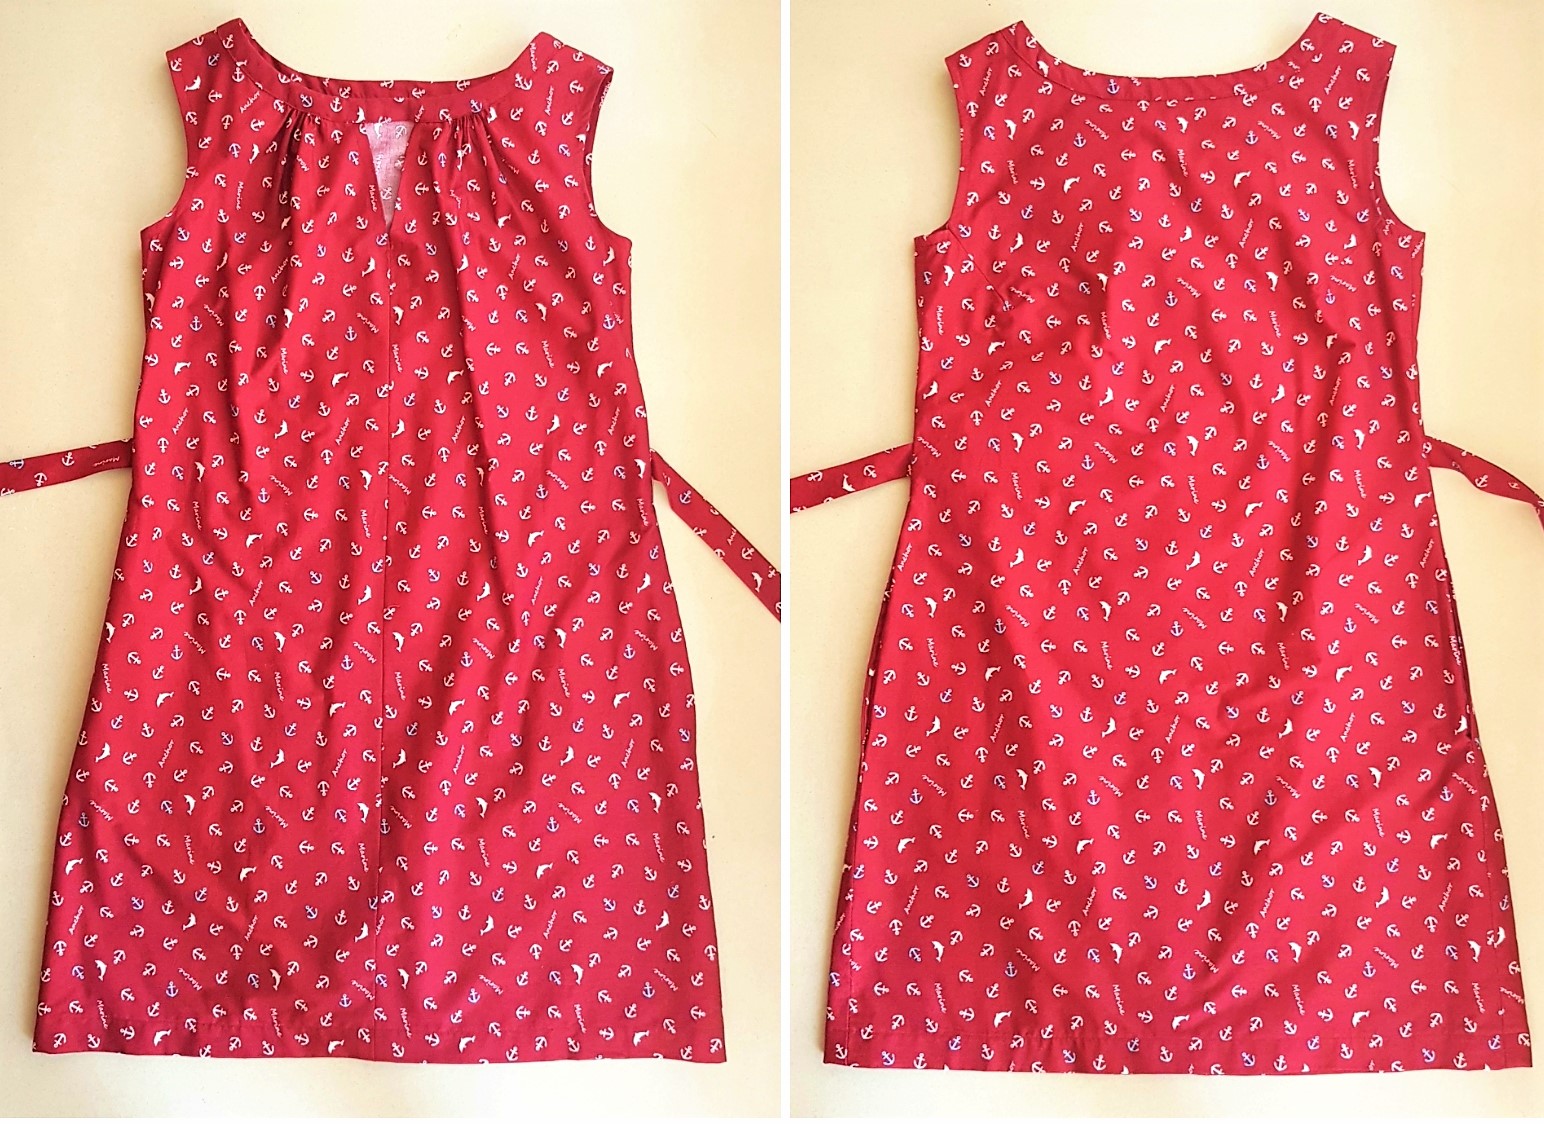
Here you can see the dress without the waist tie, a very simple and loose a-line dress that I can actually wear as it is. But I like more with the waist tie style, it adds little volume and looks nicer to me 😍
The sewing process was faster than I thought. I did in ten hours including pattern tracing and muslin. I was so surprised that the armholes fit me fine in the muslin but not really in the real fabric. It was gaping, so quick decision I added dart 1 cm wide in both back armholes. Hope you can spot in the picture below at the bottom right.
And the rest of the processes were okay, as usual I fused fusible tape in both sides of the front holes and sew as the direction.
Then hand basted and gathered both sides of the front neckline, sew both front and back bodices at the shoulders and sew the neckband.


I love inseam pockets, I sewn them few centimeters below the waistline/waist ties. I always think that any practical dress will not be perfect without inseam pockets.
And the ties were made from the same fabric, it was easy to sew with little pointy at the end. I attached right on the waistline.


And the finished dress on Ellie my dress form, front and back views.

And glad I wore the dress few days ago to test it. We visited The Venetian' Macao for a walk and lunch. I saw that I place the tie in the opposite side as in the dress form. But anyway, I liked the dress and the loose fit of it.


That's it for today post, wishing you all a happy sewing and crafting 💗 I am knitting my UFO fair isle sweater lately, a very slow process but sure I will finished before winter come 😉 And also, at the moment I am sewing self-drafted swimsuits and hope to show you when I finished.
Love,
Hana @velvetribbon_sew
You have made another lovely summer dress whch suits you well!
ReplyDeleteThank you SaSa :)xx
DeleteI love anchors on fabric so yours is a hit for me already 😄
ReplyDeleteLove your dress, it looks light and summery and great on you!
Hahaha, thank you so much. The fabric is perfect to wear in hot humid summer :)x
DeleteLove this dress. It is so pretty on you and I like the color and whimsical fabric.
ReplyDeleteThank you Tomasa :)
DeleteJust love the neckline and the anchored print you used, and how much prettier it is without the short sleeves. Annoying when the real one doesn't work as well as the toile. Sometimes that's down to a slight difference in the fabric. But the dart trick worked a treat!
ReplyDeleteThank you Janene :)
DeleteThis is just so pretty Hana, as are all your dresses, but this one is super stunning!
ReplyDeleteThank you Dawn :)
DeleteSuch a lovely dress Hana, and your alterations made a massive difference to the look.
ReplyDeleteThank you Sue :)
DeleteSO CUTE.. I saw this pattern, and didn't think much of it.. Wow..seeing it made, is adorable.. great job. Happy sewing.
ReplyDeleteI'm so behind in my blog reading Hana. This dress is lovely and the neckline detail makes it extra special.
ReplyDeleteAnother perfectly lovely dress! You make the prettiest dresses! :)
ReplyDeleteWhat a great pattern, Hana. You used the perfect fabric for it. You look amazing in your dress. I can't wait to see your swimsuits. Happy sewing!
ReplyDeleteHello,
ReplyDeleteWe snowhite read your blog..It looks great! Thanks !
baby blankets- handmade in India : snowhiteseventhavenue