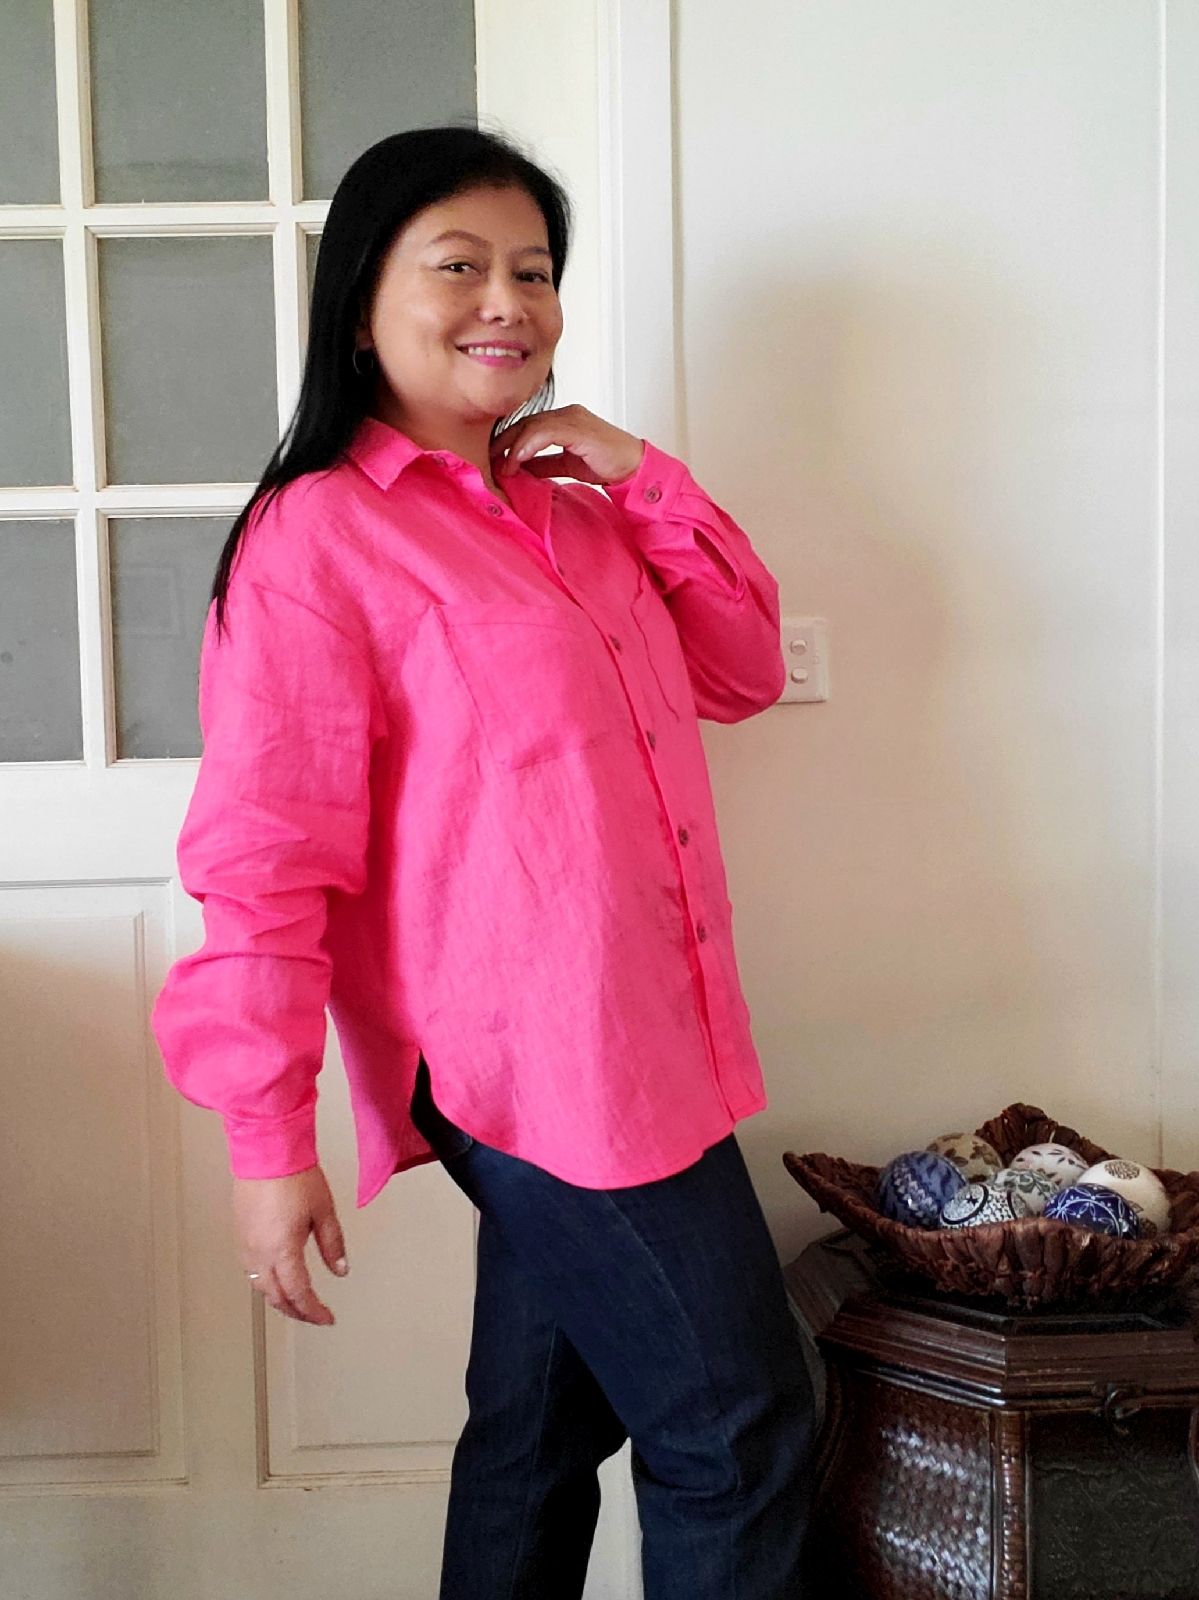
I made this oversized blouse last month for my entry to #magamniftynovember challenge on Instagram. I chose to make a nifty (stylish) blouse to wear daily and I was glad that I had all the things needed in my stash. I had 3 yards of linen fabric in pink color and almost matching the color of the buttons, I still had leftover fabric enough to make a sleeveless blouse for summer later.
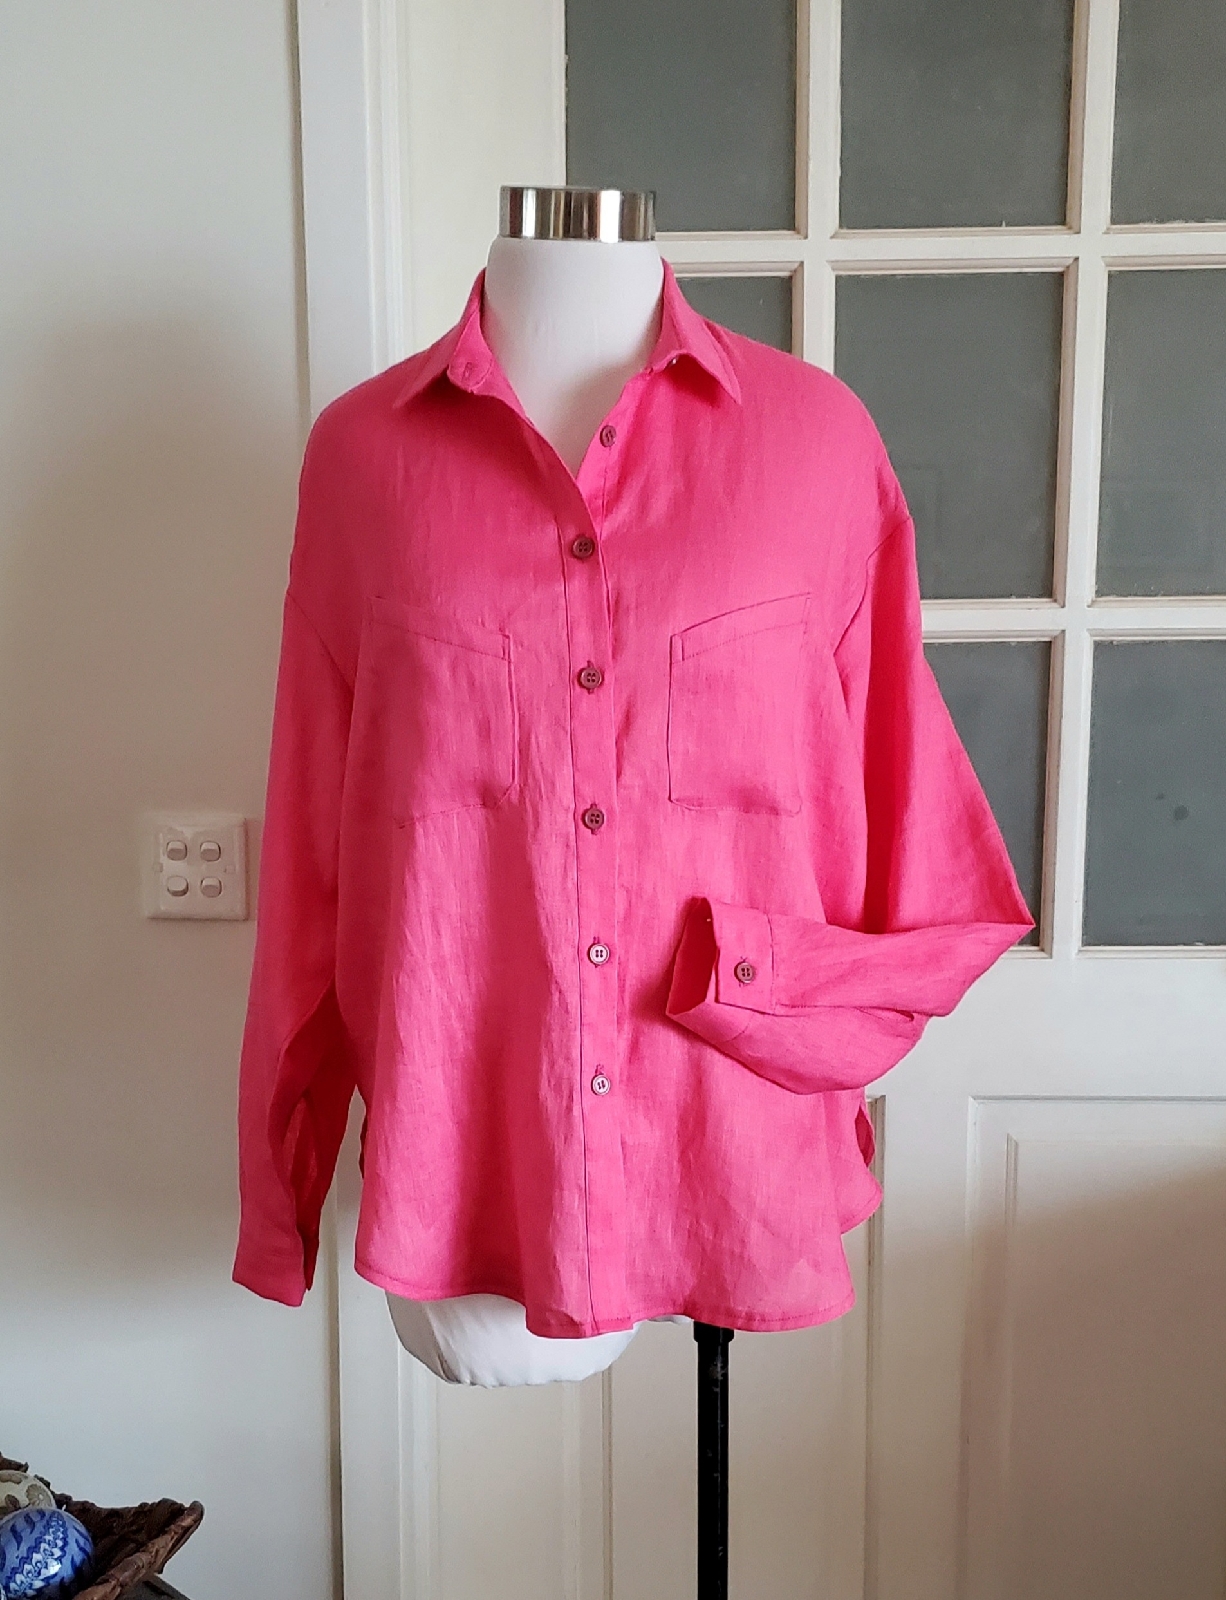
For the pattern, I used Burdastyle oversized blouse 10/2019 size 40. I omitted the back yoke and welt pocket and also, shortened the length by 8 cm.
I was planning to take step-by-step pictures of the progress, but I had a busy life and sewing time was whatever free time I had, sometime in the early morning, mid-day, or late night, so the photo quality at night wasn't so good.
So, here are a few progress that I took in the daylight, the most tricky step in the blouse-making was sewing the collar, I pinned and basted a lot before sewing it and the result was good and the collar stayed nicely.
After the collar was done, I worked on the pockets. I love the asymmetrical design, it looks cute and different from the usual collar. As always, I pinned the collar first and then carefully sewed it.
Here are the easy methods I used to sew the sleeve slit and cuff, I think I shared it before in my previous make but I'd love to share it again. I used bias tape from the same fabric for the sleeve slit and I sewed it first and then worked on the cuff as shown below.
Another time-consuming consuming was sewing the buttonholes and buttons, I wanted to do it at night but I gave up because I knew I would make a mess.
So, I did both in the next morning. I used automatic buttonholes, which sounds easy but I have to measure carefully before sewing it. And then the buttons were sewing by hand.
The blouse is finally done after working on it for a few days. And here are the pictures on the dress form and on me. I love everything about this blouse, the loose fit, the pockets, and the back pleat 💗 I'm thinking of making one more in heavier fabric as a cover-up. The weather is getting cooler and I think it's a good idea to make it in heavier fabric.
That's it for today and thank you for reading 💗
Happy sewing ✀🧵


Comments
Post a Comment