I finished another UFO, yay! I started working on this swimsuit in May, I cut the fabrics and stopped. Only in August, I picked up the fabric pieces again and I finished it in a few days. I'm glad I finally made this colour block swimsuit that I had been planning to make for so long, I love the fit and the design because it hides my food belly 😊 Also, this will be a great addition to my handmade wardrobe.
For the fabrics, I used lycra in black and green from the local shop. I bought 2 yards each and I still have leftovers enough to make another garment.
For the pattern, I used my self-drafted swimsuit based on my rtw swimsuit. I made the first wrap-style swimsuit two years ago and here is
the link in case you are interested to see it.
The picture below is the start of the progress, after I had all the pieces, I sewed the ties (2 side ties and 2 back ties, 40 cm long x 4 cm wide).
Also, I prepared 2 pieces of elastic bands (13 cm long) for under bust line.
My sewing progress started with sewing the front pieces, attaching and sewing the elastic band to the front-facing and remembering to pull the elastic evenly. I did it on another side too.
After that, I pinned the front-facing and lining together, sewing it as shown in the picture below,
I placed the tie in the middle between the lining and the outer fabric and pinned it.
I sewed the wrap line from the shoulder down and the place where I attached the tie.
And then, I worked on the back pieces, I placed the ties on both sides of the outer fabric and pinned them.
Placed the lining piece right sides together, pinned and sewed them using my overlocker machine.
I pinned and sewed the front and back pieces right sides together at the shoulder.
And then, I zig-zag stitch the inner front (the wrap lines) and inner back. After that, I pinned the side tie to the back piece.
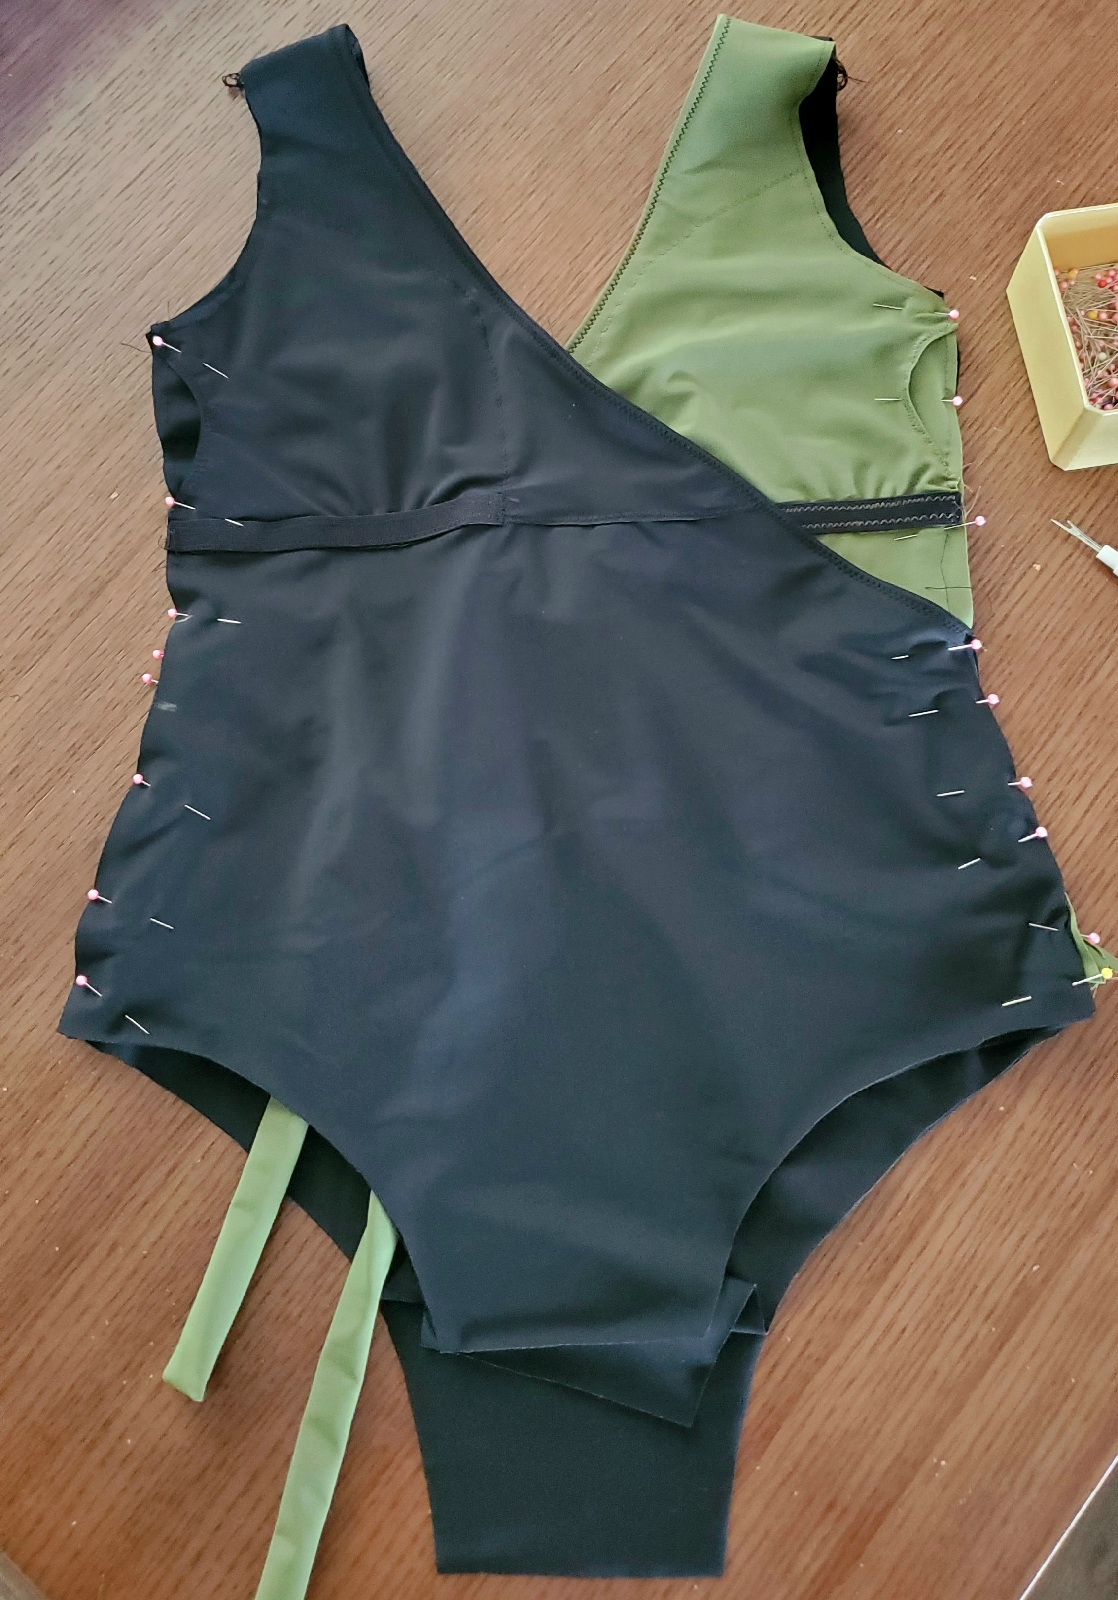
Pinned all the sides and stitched them with an overlocker machine.
Pinned and stitched the bottoms as well.
The last two parts were sewing the armholes and bottom (legs) 1 cm topstitch with a zig-zag stitch.
As the wrap always falls, I stitched a little dot in the middle where the wrap meets.
That's all the progress and here are more pictures of the back and the inner swimsuit.
And one more picture of me wearing it for a swim during our staycation in the local hotel.
Happy sewing friends and thank you for stopping by 💗


Pretty suit and pretty hotel!
ReplyDeleteThank you, Barbara 😊
Delete